xCORE-USB sliceKIT Hardware Guide
VERSION RELEASED COMMENTS DOWNLOAD 6 2014-07-29 PDF 5 2014-03-20 PDF
xCORE-USB sliceKIT Hardware Guide Read More »
VERSION RELEASED COMMENTS DOWNLOAD 6 2014-07-29 PDF 5 2014-03-20 PDF
xCORE-USB sliceKIT Hardware Guide Read More »
VERSION RELEASED COMMENTS DOWNLOAD 1.1 2014-07-29 PDF 0.9 2013-10-11 PDF
Extending startKIT using the PCIe slot and sliceCARDs Read More »
VERSION RELEASED COMMENTS DOWNLOAD 1.3 2014-07-29 PDF 1.2 2014-01-16 PDF 1.1 2014-01-06 PDF 1.0 2013-10-17 PDF
startKIT Hardware Manual Read More »
VERSION RELEASED COMMENTS DOWNLOAD 1.0 2013-11-20 PDF
Getting started with startKIT Read More »
VERSION RELEASED COMMENTS DOWNLOAD 1.0 2014-05-30 PDF
xTAG-PRO User Guide Read More »
VERSION RELEASED COMMENTS DOWNLOAD 1.3 2017-06-28 PDF 1.2 2017-06-28 PDF 1.1 2015-03-30 PDF 3 2015-03-10 PDF 1.0 2014-05-30 PDF
xCORE Architecture Flyer Read More »
VERSION RELEASED COMMENTS DOWNLOAD 1 2011-09-16 PDF
Connect multiple devices using XN Read More »
VERSION RELEASED COMMENTS DOWNLOAD 1 2012-11-01 ZIP
sliceKit Core Board 1v1 Connectivity Advisory Read More »
Just received your new sliceKIT board? Congratulations!
Here are a few steps to help get you started developing applications for multicore microcontrollers:
These are the complete development tools which give you access to xSOFTip peripherals for xCORE multicore microcontrollers, as well as documentation and quick start guides for sliceKIT.
Once you have completed the tutorials and demo applications, explore the other application examples, or use xSOFTip to start building your own!
You’ll find lots of useful tutorials, application examples and documentation in the xTIMEcomposer Studio tools, and on www.xmos.com.
More information on the sliceKIT Starter Kit is available in the product brief
.
![]()
sliceKIT Starter Kit Quick Start Read More »
HR Director
Anna joined XMOS in 2022 and brings extensive experience in Human Resources having worked within rapidly expanding international organisations across a variety of sectors in pharmaceutical, communications and FMCG.
Anna is responsible for enabling XMOS to continue to be a great place to work.

Sorry, we don't have any vacancies in this location at the moment. However, feel free to send us your CV by clicking the button below and we will let you know when we have an opening suitable for you.
If we don’t have a vacancy currently suitable to your skills, feel free to send us your CV by clicking the button below and we will let you know when we have an opening suitable for you.
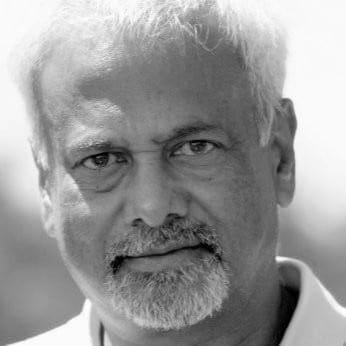
Executive VP Global Sales & Business Development
Rohit is a semiconductor veteran with more than 33 years’ experience of working across applications, marketing, and sales with global companies. During this time, he has nurtured key relationships across the semiconductor industry. While passionate about work, in his spare time, Rohit enjoys cars, golf and gadgets.
Hongquan is a partner and “Deep Tech” investor at Robert Bosch Venture Capital GmbH (RBVC). In the last decade, he has led multiple successful investments in the area of IoT, artificial intelligence, augmented reality and Automotive in Europe, US and China. Prior to RBVC, Hongquan worked at across Bosch, amassing broad experience in the automotive and electronic industries. He holds a doctoral and a diploma degree in physics from the Technical University Berlin, Germany.

Jan-Hendrik holds a Diploma in Economics and Business Engineering (focus: Telematics) from the Karlsruhe Institute of Technology, Germany and studied in Seville, Spain. He was a research fellow at QUT Brisbane, LBS London and IESE Barcelona. He obtained a Dr. rer. pol. from Technical University Dortmund, Germany.
Paul Goodridge has many years’ experience as a CFO in both public and private companies, and international finance management. As CFO of CSR, Goodridge delivered its successful IPO in 2004 and helped grow the company internationally into an $800m revenue business, significantly growing it in value to become a member of the FTSE 250. While working as CFO and then non-exec of GFI Software, he oversaw exits of over $1.5bn.
Goodridge has spent the last half decade as a non-executive director for software companies with a combined exit value of over $800m, and a consultant working with a large European VC.

Jalal boasts over 35 years of experience in both public and private semiconductor businesses – most recently as CEO of Dialog Semiconductor, a specialist chip company for mobile and IoT devices – he is well-versed in the nuances of a complex and multifaceted industry that is one of the strongest value-generators world-wide.

Bill co-founded Foundation Capital in 1995. Investing primarily in cloud applications and infrastructure, he operates on the belief that substantial, sustainable companies are the result of matching technology and market opportunity with the right entrepreneur and management team.
Bill has a BSEE and an MSEE from Purdue University, and an MBA from the Stanford GSB. But he learns the most from the entrepreneurs, whom he helps to build strong organizations from the ground up.
Charles’ is Founder and Chairman of Cambridge Phenomenon Ltd. He co-authored The Cambridge Phenomenon 50 Years of Innovation and Enterprise and The Cambridge Phenomenon: Global Impact. His focus is on building global hi-tech companies and the development of technology clusters.
An experienced director of public companies, Charles’ specialist areas include strategy, marketing, compensation, board and team building, coupled with the diplomacy and organisational know-how needed to identify and solve problems. He holds a BA Hons in Physics from Oxford University and is a Fellow of the Institute of Physics and a Fellow of the Royal Society of Arts.
In 2015 Hermann was awarded an KBE for services to Engineering and Industry.
Serial Entrepreneur and Co-founder of Amadeus Capital Partners, Dr Hermann Hauser KBE has wide experience in developing and financing companies in the information technology sector. He has founded and co-founded a significant number of companies across a wide range of technology sectors, including Acorn Computers which spun out ARM.
Among his many accolades, Hermann is a Fellow of the Royal Society, the Institute of Physics, the Royal Society of Chemistry and of the Royal Academy of Engineering, as well as an Honorary Fellow of King’s College, Cambridge and Distinguished Fellow of BCS, the Chartered Institute for IT.
Peter Flach has been Professor of Artificial Intelligence at the University of Bristol since 2003. An internationally leading researcher in the areas of mining highly structured data and the evaluation.
David May is a Professor in the Department of Computer Science at the University of Bristol and founder of XMOS Semiconductor. He served as Chief Technology Officer at XMOS until February 2014.

Sir Robin Keith Saxby was Chief Executive and then Chairman of ARM Holdings, which he built to become a dominant supplier of embedded systems.

Mark leads XMOS. His main focus is to encourage innovation, enable profitable growth and look to the future.
Jochen has over 25 years of experience of managing technology and machinery companies with significant operational and international expertise.
Hitesh is a co-founder of XMOS. He has extensive experience as a venture capital investor in European high technology companies as well as significant operational experience as CEO.
Prior to Acacia Capital Partners – successful exits include Shazam (acquired by Apple) and Solarflare (acquired by Xilinx), Hitesh was a General Partner of Amadeus Capital Partners Limited. At Amadeus, Hitesh served on the firm’s Investment Committee and was involved in some of Amadeus’ most successful investments, including Entropic (acquired by Microsoft), Element 14 (acquired by Broadcom), and Whereonearth (subsequently acquired by Yahoo).
Hitesh was awarded a scholarship from IBM and obtained an Honours degree in Computer Science from Warwick University.

Alan has been in the venture capital industry for more than twenty years, initially through establishing a corporate venturing fund for Ferranti and then with Foreign & Colonial Ventures, Newmarket Venture Capital and Prelude Ventures. He joined DFJ Esprit when it was formed in 2006. Alan is responsible for a portfolio of Draper Esprit’s electronics investments including Phyworks, Lime Microsystems, SiConnect, XMOS and DisplayLink. His previous investments have included Alphamosaic (sold to Broadcom) and nCipher (IPO on LSE).
Alan has an electronic engineering background and gained his industrial experience in computer systems with Ferranti plc. Alan is a past member of the European Venture Capital Association High Tech Committee and lecturer on the EVCA’s venture capital professional training courses.
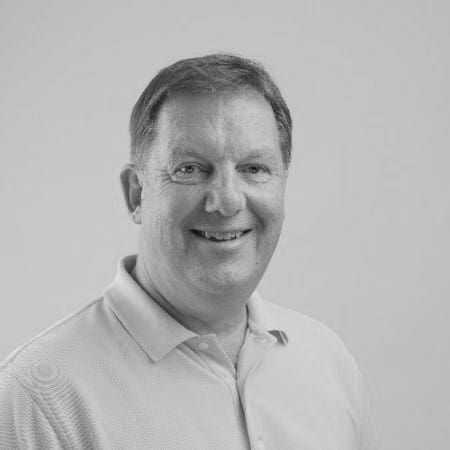
CEO & President
Mark leads XMOS. His main focus is to encourage innovation, enable profitable growth and look to the future.
Mark joined XMOS in 2008 and held the roles of COO and VP Engineering before taking the helm as CEO. Mark has extensive experience across the electronics industry, with involvement in both blue-chip and start-up companies.
CTO
Henk provides the strategic direction for our future developments in Silicon devices, applications, and underpinning technologies.
Prior to joining XMOS, Henk was a Reader at the University of Bristol, where he was involved in the research and teaching of Computer Architecture, Compilers, Ubiquitous Computing, and Wearable computing. He’s also held positions at the University of Amsterdam and Philips Research Labs.

CFO
After qualifying as a Chartered Accountant with Smith & Williamson, Stuart spent six years advising listed- and PE-backed businesses before moving to Somerfield Stores as Director of Financial Reporting. After Somerfield, he joined a fast-growing high-end bike distribution business, Saddleback Limited. Since then, Stuart has operated as FD and CFO of a number of business across multiple sectors including distribution, ad-tec, property services and latterly the charitable sector.
Executive VP Marketing & Product Management
Aneet leads strategy and development, his main focus is to set and execute company strategy and build key relationships.
Aneet joined in 2018 and prior to that was Business Head AR / VR at Intel Corporation. Aneet has extensive, international experience in building ecosystems around and shaping the future of Speech and compute vision technologies.
Executive VP Sales
Joe steers the global sales team. His main focus is to build new relationships, nurture existing clients and drive top-line growth. Joe has extensive experience across sales and marketing.

Senior VP Operations
Sunny leads the factory, his main focus is to run supply chain, look after our vendor partnerships and manage production quality.
Sunny joined in 2009 and prior to that held senior engineering, test management and field application positions across the industry.
Executive VP Engineering
Andrew is responsible for all core engineering activities, delivering our applications, tools, silicon and technology infrastructure.
With over 30 years technical leadership across high-tech ventures, Andrew has extensive experience in the consumer, automotive and defence sectors.
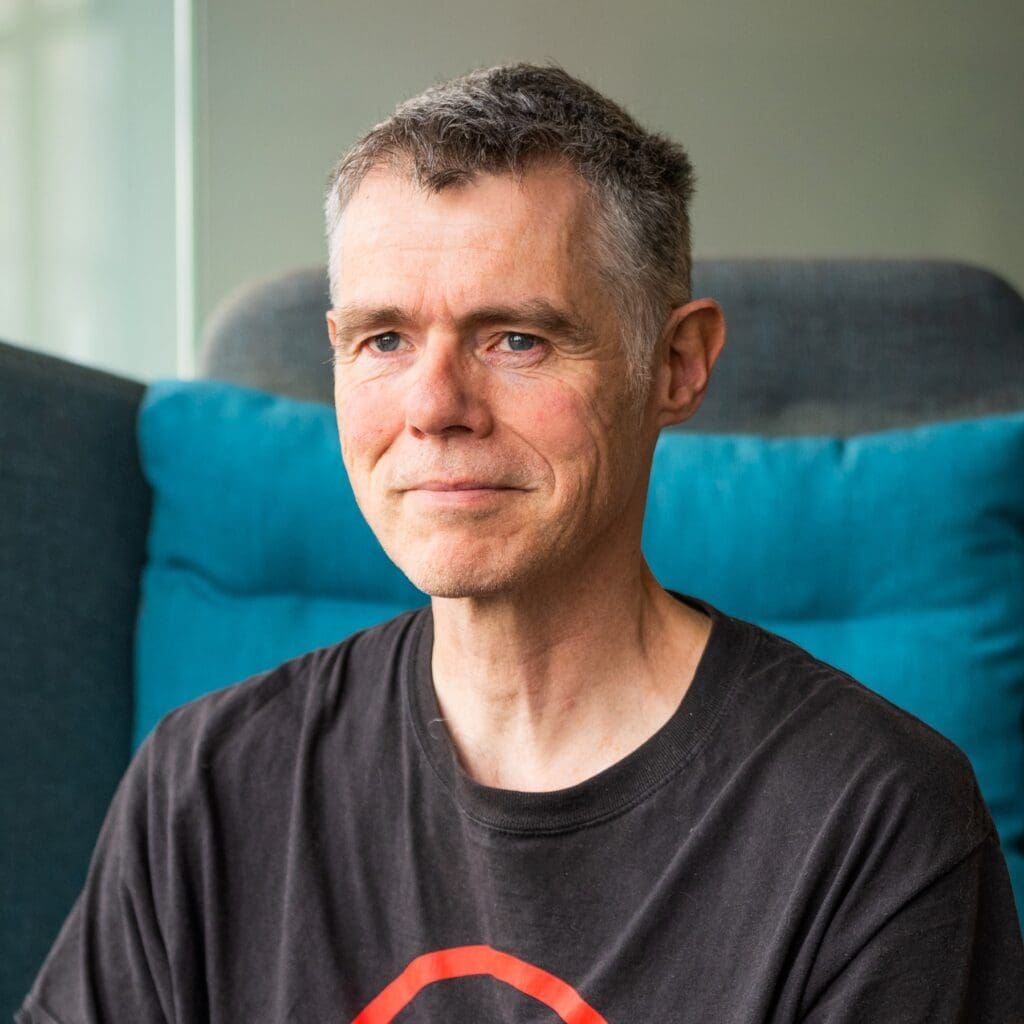
General Manager, Boston
Jochen has over 25 years of experience of managing technology and machinery companies with significant operational and international expertise.
As CEO of Setem Technologies he pursued the merger with XMOS and currently serves on the boards of XMOS, Snappii, ICT and Burgess Industries.

Sorry, we don't have any vacancies in this location at the moment. However, feel free to send us your CV by clicking the button below and we will let you know when we have an opening suitable for you.
Sorry, we don't have any vacancies in this location at the moment. However, feel free to send us your CV by clicking the button below and we will let you know when we have an opening suitable for you.