Installation of Visual Studio Code
This section is optional and may be skipped if not using VS Code. As an alternative, the command line XTC Tools can be used with any code editor.
Install Visual Studio Code (VS Code) from https://code.visualstudio.com/download. Version 1.106.2 is the earliest supported release.
Visual Studio Code terminology is used in the XMOS XTC Tools documents. For further explanation of terms used see https://code.visualstudio.com/docs/getstarted/userinterface.
Use the VS Code click-through user installer.
Follow Apple instructions to install Visual Studio Code into the /Applications folder,
typically under /Applications/Visual Studio Code.app.
Download the .deb package and install using the the apt tool.
See documentation on this tool for further information.
Installation of the Visual Studio Code XMOS XTC Tools extension
The following steps will install the XMOS XTC Tools extension in Visual Studio Code.
This section is optional and may be skipped if not using VS Code.
Start VS Code
Go to the Start Menu
Find Visual Studio Code and launch it
Go to the Launchpad
Select Visual Studio Code and launch it
Open a shell
At the shell prompt type
$ code
Install the XMOS XTC Tools VS Code extension
Open the VS Code Extensions Marketplace by clicking the Extensions icon in the Activity Bar, shown highlighted at the bottom left of the VS Code Extensions figure below.
The EXTENSIONS panel will open in the Primary Side Bar.

Fig. 1 VS Code Extension Marketplace
Type
XMOSin the Search Extensions in Marketplace search box.The search results will be filtered, and the XMOS XTC Tools extension will be shown in the list.
Click the blue Install button on the XMOS XTC Tools entry in the search results. The extension will be downloaded and installed.
The XMOS XTC Tools extension icon will appear in the Activity Bar
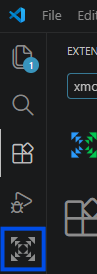
Fig. 2 The XMOS icon in the VS Code Activity Bar
If the XMOS XTC Tools extension icon does not appear, close and restart VS Code