Using the Tool#
In this section the basic operation of the tools provided by lib_audio_dsp is described.
This document takes the user through three scenarios, illustrated by way of the included example app_simple_audio_dsp_integration, which may be found in the examples directory in lib_audio_dsp.
These scenarios are:
Creating a pipeline
Tuning and simulating a pipeline
Deploying pipeline code onto the xcore.
The steps in this guide should be executed in a Jupyter Notebook.
Creating a Pipeline#
A simple yet useful DSP pipeline that could be made is a bass and treble control with output limiter. In this design the product will stream real time audio boosting or suppressing the treble and bass and then limiting the output amplitude to protect the output device.
The DSP pipeline will perform the processes shown in Fig. 5.

Fig. 5 The target pipeline#
The first step is to create an instance of the
Pipeline
class. This is the top level class which
will be used to create and tune the pipeline. On creation the number of inputs
and sample rate must be specified.
from audio_dsp.design.pipeline import Pipeline

pipeline, inputs = Pipeline.begin(
    1,          # Number of pipeline inputs.
    fs=48000    # Sample rate.
)
The Pipeline object can now be used to add DSP stages. For high shelf and low
shelf use Biquad and for
the limiter use LimiterPeak.
For a full list of available DSP stages, see the DSP Stages List.
from audio_dsp.design.pipeline import Pipeline
from audio_dsp.stages import *

p, inputs = Pipeline.begin(1, fs=48000)

# i is a list of pipeline inputs. "lowshelf" is a label for this instance of Biquad.
# The new variable x is the output of the lowshelf Biquad
x = p.stage(Biquad, inputs, "lowshelf")

# The output of lowshelf "x" is passed as the input to the
# highshelf. The variable x is reassigned to the outputs of the new Biquad.
x = p.stage(Biquad, x, "highshelf")

# Connect highshelf to the limiter. Labels are optional, however they are required
# if the stage will be tuned later.
x = p.stage(LimiterPeak, x)

# Finally connect to the output of the pipeline.
p.set_outputs(x)

p.draw()
Fig. 6 demonstrates the output of the Jupyter Notebook when the above snippet was executed. The Jupyter Notebook will illustrate the designed pipeline. For information on creating more complex pipeline topologies, see Designing Complex Pipelines.
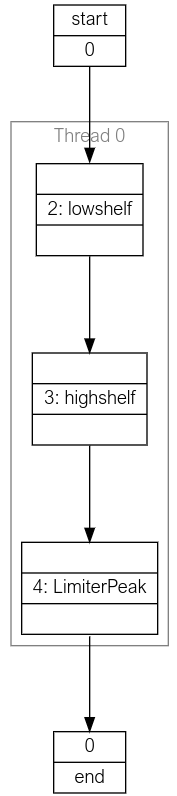
Fig. 6 Generated pipeline diagram#
Tuning and simulating a pipeline#
Each stage contains a number of designer methods which can be identified as they
have the make_ prefix. These can be used to configure the stages. The stages
also provide a plot_frequency_response() method which shows the magnitude
and phase response of the stage with its current configuration Fig. 7.
The two biquads created above will have a flat frequency response until they are tuned. The code
below shows how to use the designer methods to convert them into the low shelf
and high shelf that is desired. The individual stages are accessed using the
labels that were assigned to them when the stage was added to the pipeline.
# Make a low shelf with a centre frequency of 200 Hz, q of 0.7 and gain of +6 dB
p["lowshelf"].make_lowshelf(200, 0.7, 6)
p["lowshelf"].plot_frequency_response()

# Make a high shelf with a centre frequency of 4000 Hz, q of 0.7 and gain of +6 dB
p["highshelf"].make_highshelf(4000, 0.7, 6)
p["highshelf"].plot_frequency_response()
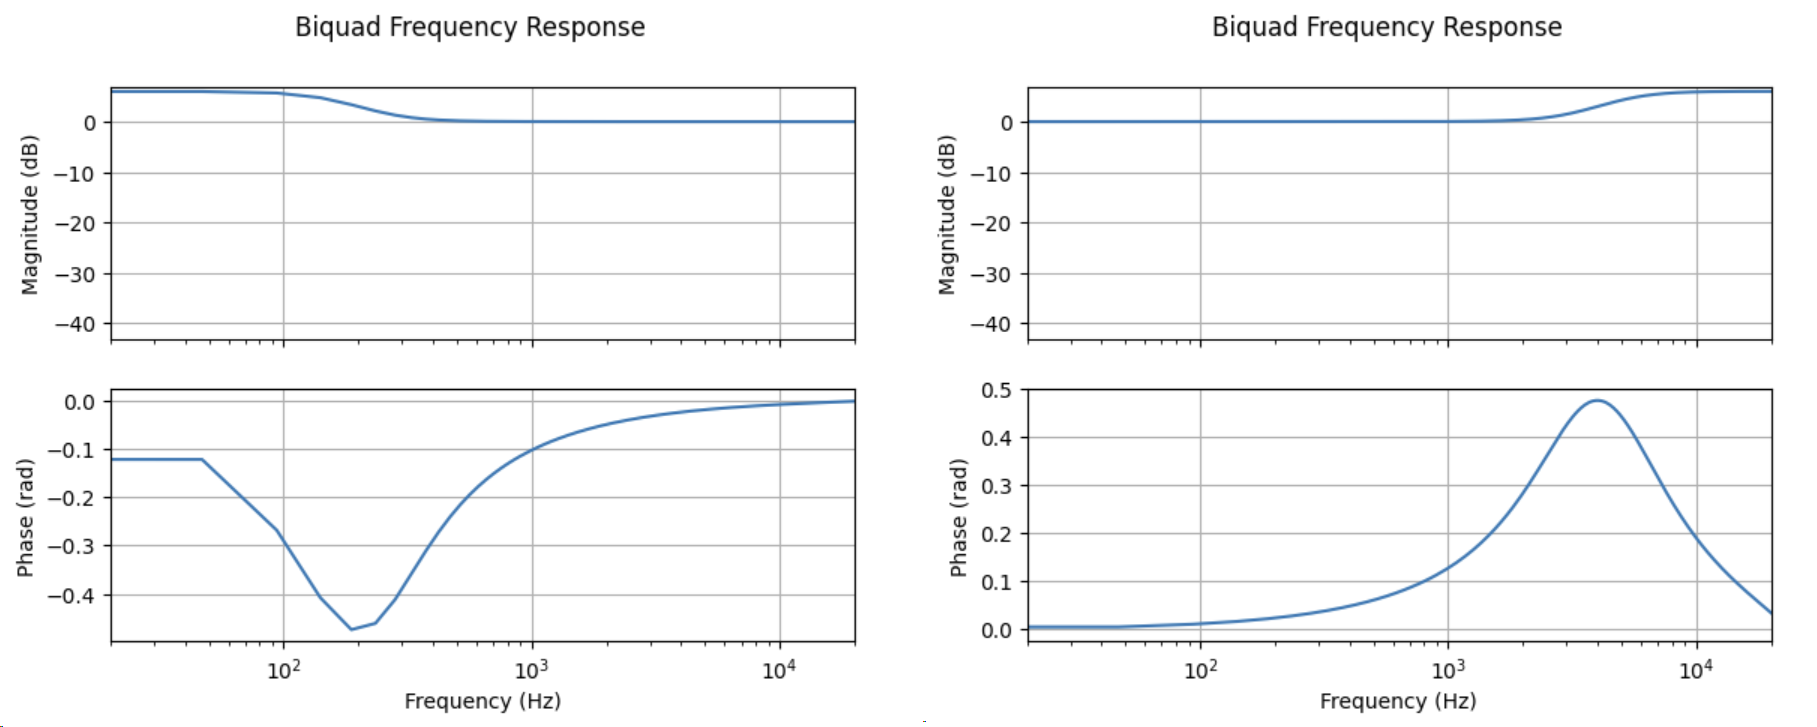
Fig. 7 Frequency response of the biquads (low shelf left, high shelf right)#
For this tutorial the default settings for the limiter will provide adequate performance.
Code Generation#
With an initial pipeline complete, it is time to generate the xcore source code
and run it on a device. The code can be generated using the
generate_dsp_main()
function.
from audio_dsp.design.pipeline import generate_dsp_main
generate_dsp_main(p)
The reference application should then provide instructions for compiling the application and running it on the target device.
Note
Application Note AN02014 discusses integrating a DSP pipeline into the XMOS USB Reference Design.
The generate_dsp_main()
function will cause the tuned DSP pipeline to run on the xcore device,
where it can be used to stream audio.
The next step is to iterate on the design and tune it to perfection.
One option is to repeat the steps described above, regenerating the
code with new tuning values until the performance requirements are satisfied.
Designing Complex Pipelines#
The audio dsp library is not limited to the simple linear pipelines shown above. Stages can scale to take an arbitrary number of inputs, and the outputs of each stage can be split and joined arbitrarily.
When creating a new DSP pipeline, the initialiser returns the pipeline input channels as
an instance of
StageOutputList, a list-like container of
StageOutput.
When adding a new stage to the pipeline, a StageOutputList is used to pass the stage inputs.
The stage initialiser returns a new instance of StageOutputList containing its outputs.
To select specific channels from a StageOutputList to pass to another
stage, standard Python indexing can be used. Channels from multiple instances of
StageOutputList can be combined by using the + operator.
The below shows an example of how this could work with a pipeline with 7 inputs.
 # start with 7 input channels
 p, inputs = Pipeline.begin(7, fs=48000)

# pass the first 2 inputs to a 2-channel Biquad
i0 = p.stage(Biquad, i[0:2])

# pass the third input (index 2) to a 1-channel biquad
i1 = p.stage(Biquad, i[2])

# pass the inputs at index 3, 5, and 6 to a 3 channel biquad
i2 = p.stage(Biquad, i[3, 5, 6])

# pass all of i0 and i1, as well as the first channel in i2
# to create a 4 channel biquad
i3 = p.stage(Biquad, i0 + i1 + i2[0])

# The pipeline output has 6 channels:
# - all four i3 channels
# - the 2nd and 3rd channel from i2
p.set_outputs(i3 + i2[1:])
In order to split a signal path, a Fork stage
should be used. This takes a count parameter that specifies how many times to duplicate each input to
the Fork. The code block below shows how the signal chain can be forked:
p, inputs = Pipeline.begin(1, fs=48000)

# fork the input to create a 2 channel signal
x = p.stage(Fork, inputs, count=2)

# fork again to create a 4 channel signal
x = p.stage(Fork, x, count=2)

# there are now 4 channels in the pipeline output
p.set_outputs(x)
As the pipeline grows it may end up consuming more MIPS than are available on a
single xcore thread. The pipeline design interface allows adding additional
threads using the
next_thread()
method of the Pipeline instance. Each thread
in the pipeline represents an xcore hardware thread. Do not add more threads
than are available in your application. The maximum number of threads that
should be used, if available, is five. This limitation is due to the architecture of the xcore
processor.
# thread 0
i = p.stage(Biquad, i)

# thread 1
p.next_thread()
i = p.stage(Biquad, i)

# thread 2
p.next_thread()
i = p.stage(Biquad, i)