Get started with xTIMEcomposer
Start xTIMEcomposer Studio
To start xTIMEcomposer Studio:
In Windows:
Choose .
In OS X:
Open a new Finder window, navigate to the Applications folder, open the folder XMOS_xTIMEcomposer_13 and double-click on the xtimecomposer.app icon.
In Linux:
Open a terminal window, change to the installation directory and enter the following commands:
source SetEnv
xtimecomposer
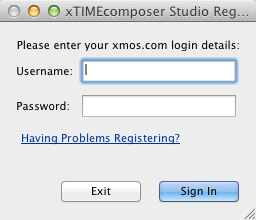
Register xTIMEcomposer
The first time you start xTIMEcomposer Studio, you are required to register the tools with your XMOS account so you must be connected to the internet.

Once you have registered xTIMEcomposer you can use the tools offline although we recommend that you remain connected as often as possible in order to download the latest versions of software and documentation.
Registration provides benefits such as automatic notifications of document and software updates directly within the Studio, and the option to manage account settings from within the tools.
Start the command-line tools
The xTIMEcomposer command-line tools use a set of environment variables when searching for header files, libraries and target devices (see Environment Variables Affecting XCC). To add the xTIMEcomposer tools to the path and configure the default set of environment variables:
In Windows:
Choose .
In OS X:
Open a Terminal window, change to the installation directory and enter the following command:
SetEnv.command
In Linux:
Open a Terminal window, change to the installation directory and enter the following command:
source SetEnv
You can now run any of the tools by entering its name and command-line options. Some of the most common commands are summarized in the following section.
Welcome window
The Welcome window in xTIMEcomposer Studio provides a convenient starting point for all users, including developers who are new to XMOS and experienced users.
Developers with an xCORE development board, can use the page to check their board is working correctly, download firmware and find kit-specific documentation or tutorials. Those who do not have a board you can follow a tools tutorial using the simulator or download xTIMEcomposer related documentation and programming guides.
In xTIMEcomposer Studio, choose to view the Welcome window at any time.
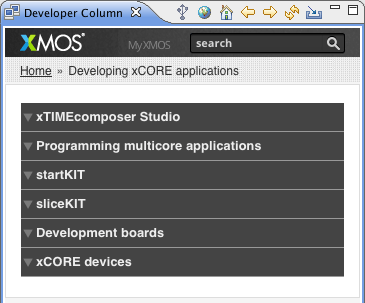
Developer Column
The xTIMEcomposer Developer Column contains a web bowser that displays all the information developers need when writing real-time multicore applications, including:
- a live view of the XMOS website (xmos.com), allowing users to download the latest software and documentation from within the development tools, as well as managing their XMOS account;
- documentation and examples for xCORE resources such as xSOFTip or HowTo examples, as you select them in the xTIMEcomposer perspectives;
- interactive tutorials that show you how to use XMOS development kits and program real-time multicore applications are also displayed in the Developer Column. Tutorials are loaded into the Developer Column using .

Developers navigate the content using the Developer Column toolbar, which provides the following options:
- Detect connected hardware checks for any connected hardware and displays links to the latest software and documentation related to the hardware. If no hardware is available the latest resources for xTIMEcomposer are displayed (
 ) .
) . - Home loads the default Developer Column home page that displays content related to the tools, development boards and silicon devices (
 ) .
) . - Local Home loads the home page for xTIMEcomposer and programming content that has been downloaded and stored offline using the Update offline content option (
 ) .
) . - Back and Forward navigate between the next and previous web pages in the Developer Column (
 ) .
) . - Refresh reloads the current web page (
 ) .
) . - Update offline content downloads to your local drive the documentation for xTIMEcomposer and programming C applications so they can be used in the Developer Column when xTIMEcomposer is offline (
 ) .
) .
The Developer Column can be displayed at any time using .